SSO user creation and authorisation
SSO user creation and authorisation is the identity module where the broker's CRM owns and controls user authentication.
The broker's CRM must store the user's preferred language. When a user first registers in the broker's client area, this is used to send the welcome email in the correct language.
Prerequisites
Before implementing SSO user creation and authorisation, ensure completion of:
- Setup actions: Infrastructure & connectivity, authentication of API calls
- Contracts: Broker identification, screen URL conventions
User creation flow
Flow diagram
The flow proceeds through the following stages:
- The user launches the cTrader application.
- The platform fails to find a stored
accessTokenlocally. - The platform opens the custom login/signup screen with the
firstLoginparameter set totrue. - The user completes the broker's requirements and registers on the broker's CRM.
- The broker backend sends a user creation request to the cTrader backend (
POST /oauth2/ctid/create). - The cTrader backend creates the user and responds with the
userId(POST /oauth2/ctid/create). - The broker stores the link between its internal user and the
userId. - (Optional) The user confirms the broker's agreement (
PUT /oauth2/ctid/acceptAgreement). - The browser opens the account creation screen; the submitted form is sent to the broker backend.
- The broker backend requests a trading account creation and the cTrader backend returns the account
login(POST /webserv/traders). - The broker backend requests account linkage and the cTrader backend confirms it (
POST /ctid/link). - The broker stores the account record and generates an OT token.
- The user is redirected to the success URL with the OT token passed as the
tokenparameter. - The application detects the success URL, closes the web browser and stores the token.
- The application opens a connection to the cTrader backend and sends an authorisation request with the
token. - The cTrader backend exchanges the OT token for a long-term access token (
POST /oauth2/onetime/authorize). - The broker CRM verifies the
tokenand responds with theuserIdandaccessToken(POST /oauth2/onetime/authorize). - The cTrader backend authorises the session under the
userIdand returns theaccessToken. - The platform stores the
accessTokenfor future use. - The application starts authorised communications with the cTrader backend.
User authorisation flow
Applies when the user already exists in both the broker's CRM and the cTrader backend, but the app has no stored accessToken. The user authenticates with their credentials on the broker's login screen.
Flow diagram
The flow proceeds through the following stages:
- The user launches the cTrader application.
- The platform fails to find a stored
accessToken. - The platform opens the custom login/signup screen.
- The user fills out the authorisation form and is authorised on the broker's CRM.
- The CRM finds the stored
userIdand generates an OT token. - The user is redirected to the success URL with the OT token passed as the
tokenparameter. - The application detects the success URL, closes the web browser/iframe and stores the
token. - The application opens a connection to the cTrader backend and sends an authorisation request with the
token. - The cTrader backend exchanges the OT token for a long-term access token (
POST /oauth2/onetime/authorize). - The broker CRM verifies the token and responds with the
userIdandaccessToken(POST /oauth2/onetime/authorize). - The cTrader backend authorises the session under the
userIdand returns theaccessToken. - The platform stores the
accessTokenfor future use. - The application starts authorised communications with the cTrader backend.
Automatic re-login flow
Applies when the user previously authenticated on the same app and device, selected Keep me logged in and the app has an accessToken in local storage.
Flow diagram
The flow proceeds through the following stages:
- The user launches cTrader.
- The application finds the stored
accessToken. - The application opens a connection to the cTrader backend and sends an authorisation request with the
accessToken. - The cTrader backend authorises the user via the
accessToken(POST /oauth2/authorize). - The broker CRM checks the
accessTokenand responds with theuserId(POST /oauth2/authorize). - The cTrader backend authorises the current session under the
userId. - The application starts authorised communications with the cTrader backend.
API specifications
Endpoints used
This flow uses the following API reference endpoints.
Broker → cTrader
POST /oauth2/ctid/create— create a userPOST /webserv/traders— create a traderPOST /ctid/link— link a trading accountPUT /oauth2/ctid/acceptAgreement— confirm user agreementPUT /oauth2/ctid/changeEmail— change a user's emailGET /oauth2/ctid/getUserId— read a user's ID by emailPUT /oauth2/ctid/logout— log out a user from cTrader
cTrader → broker CRM
POST /oauth2/onetime/authorize— verify and exchange an OT tokenPOST /oauth2/authorize— verify a long-term access tokenPOST /oauth2/onetime/generate— generate an OT token for an in-app actionPUT /oauth2/logout— log out a user from the CRM
Required screens
See URL conventions and query parameters for URL format rules and parameter definitions.
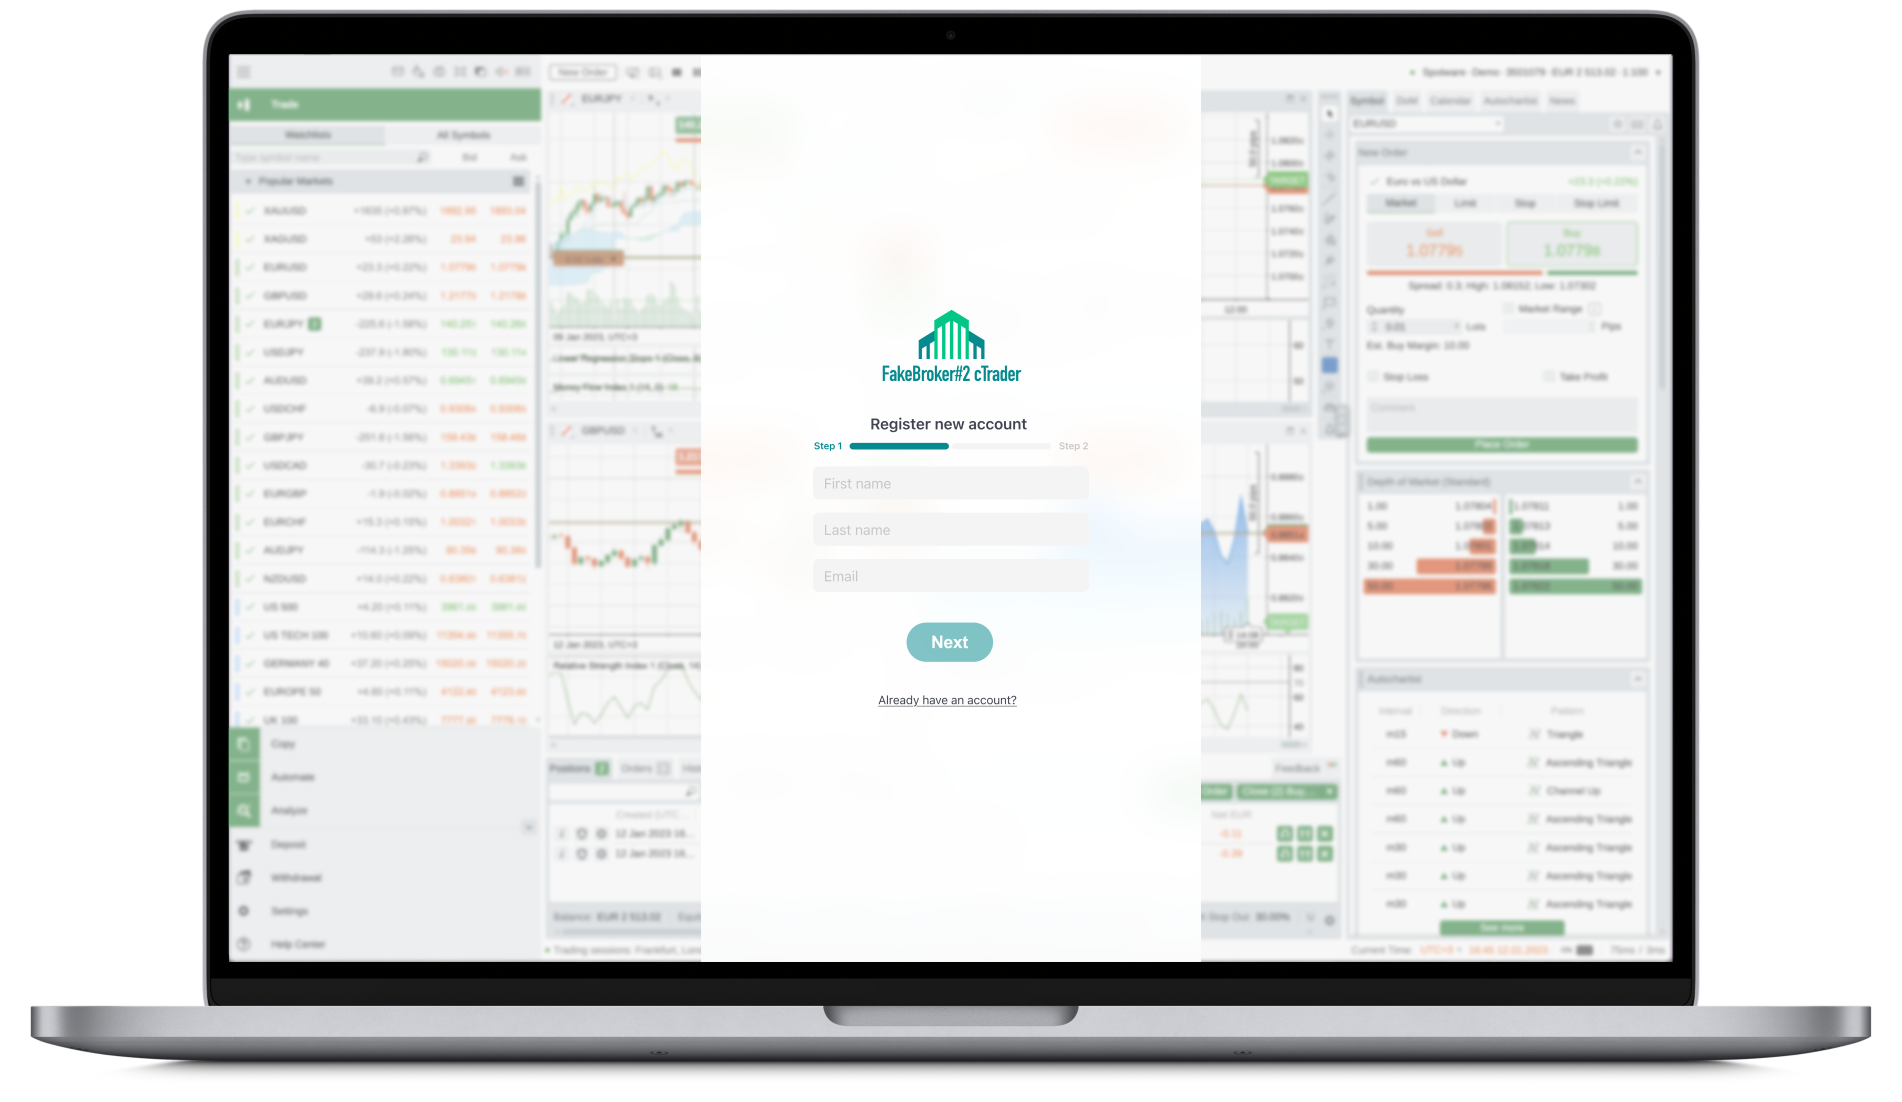
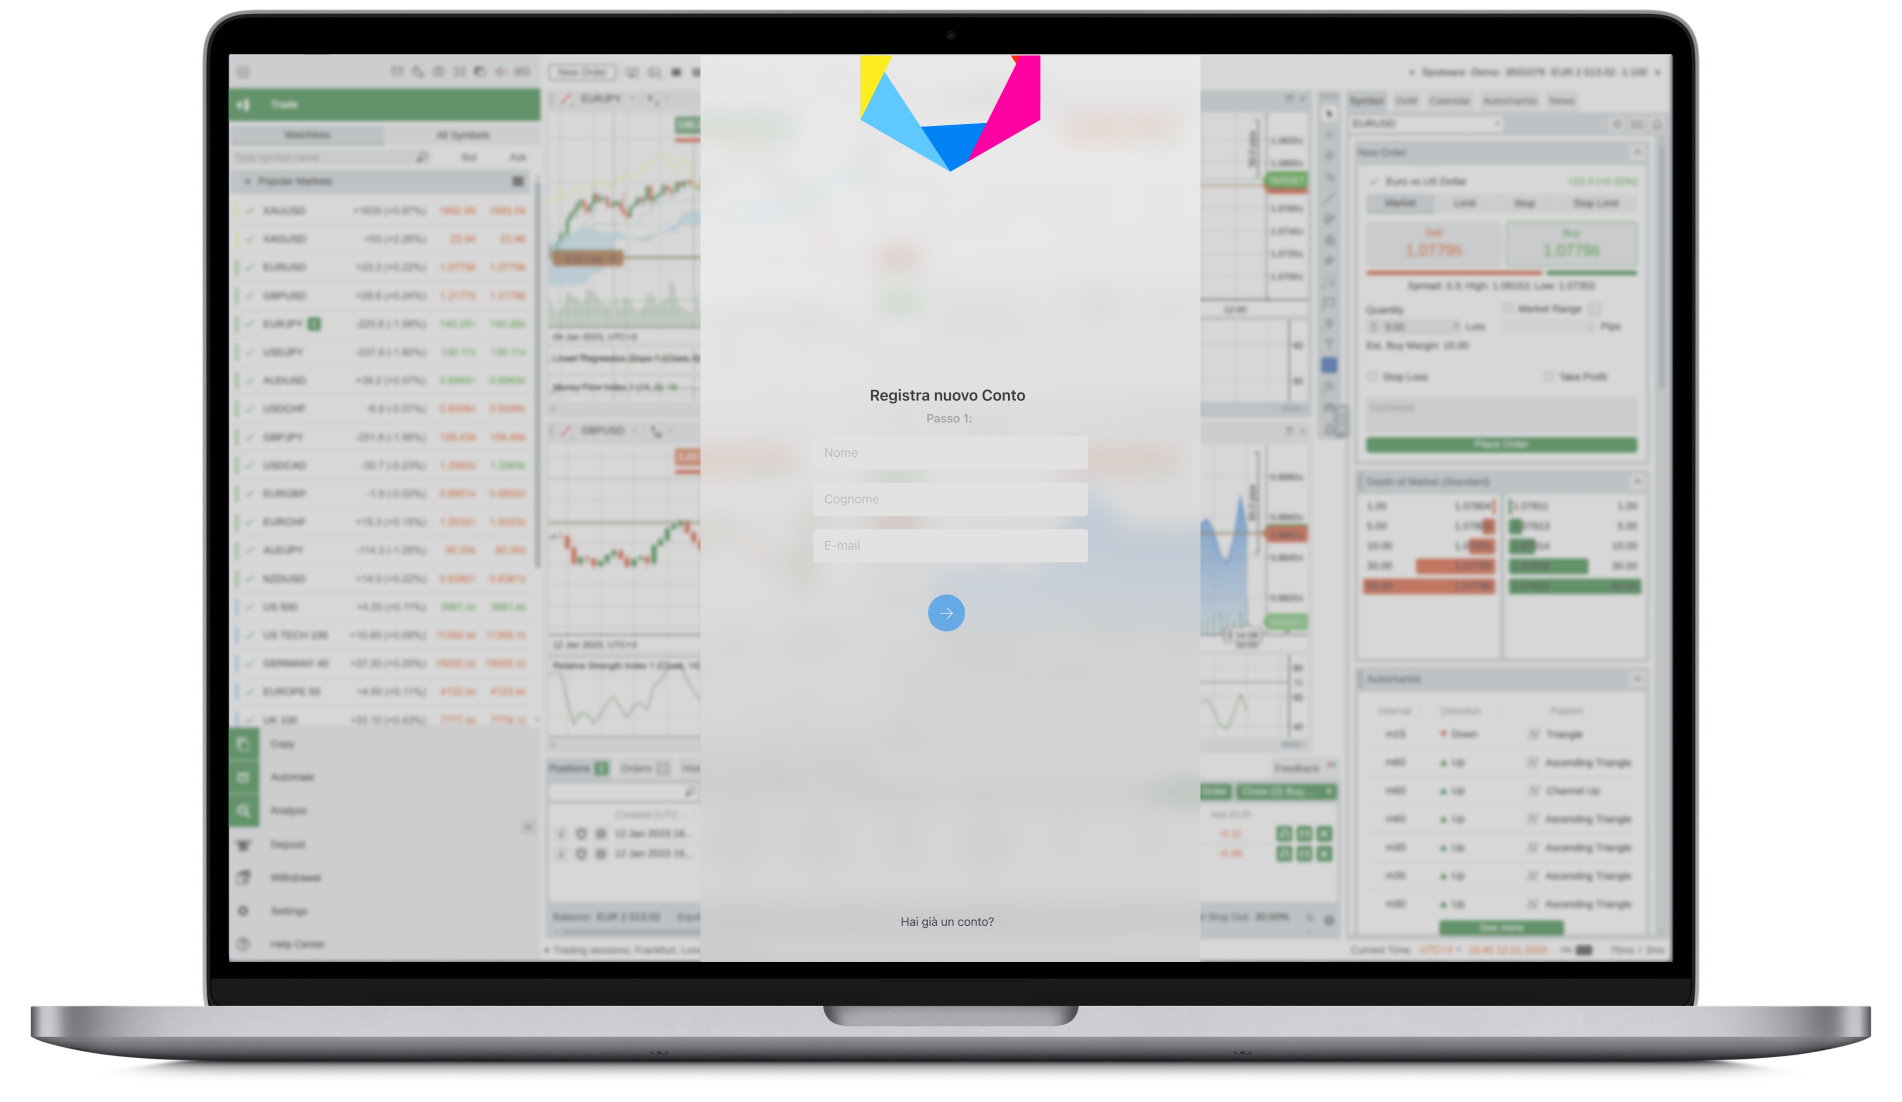
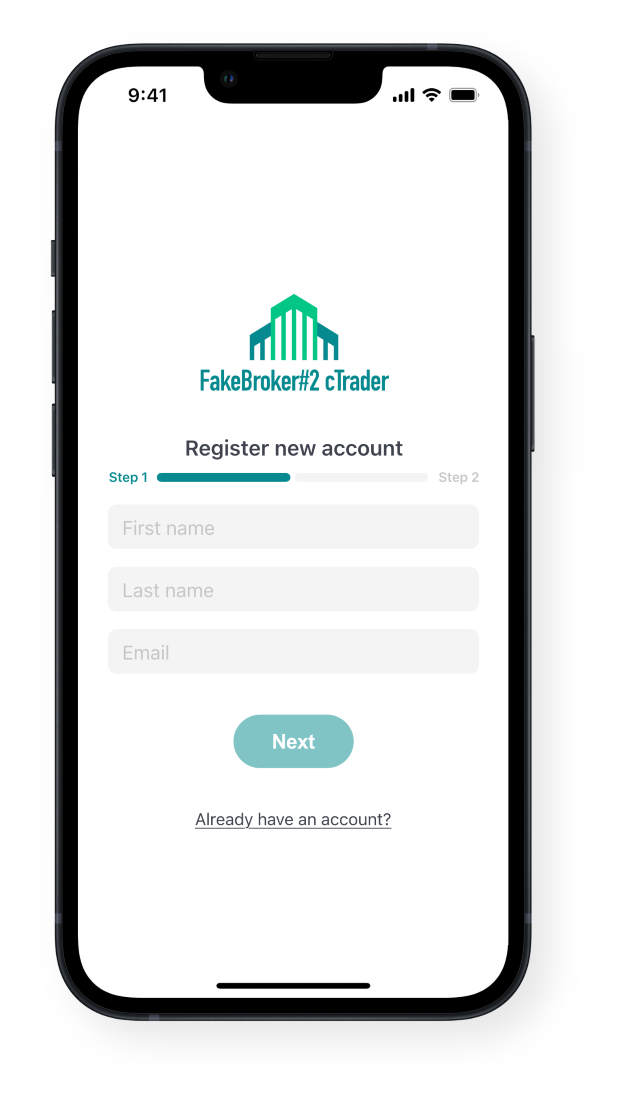
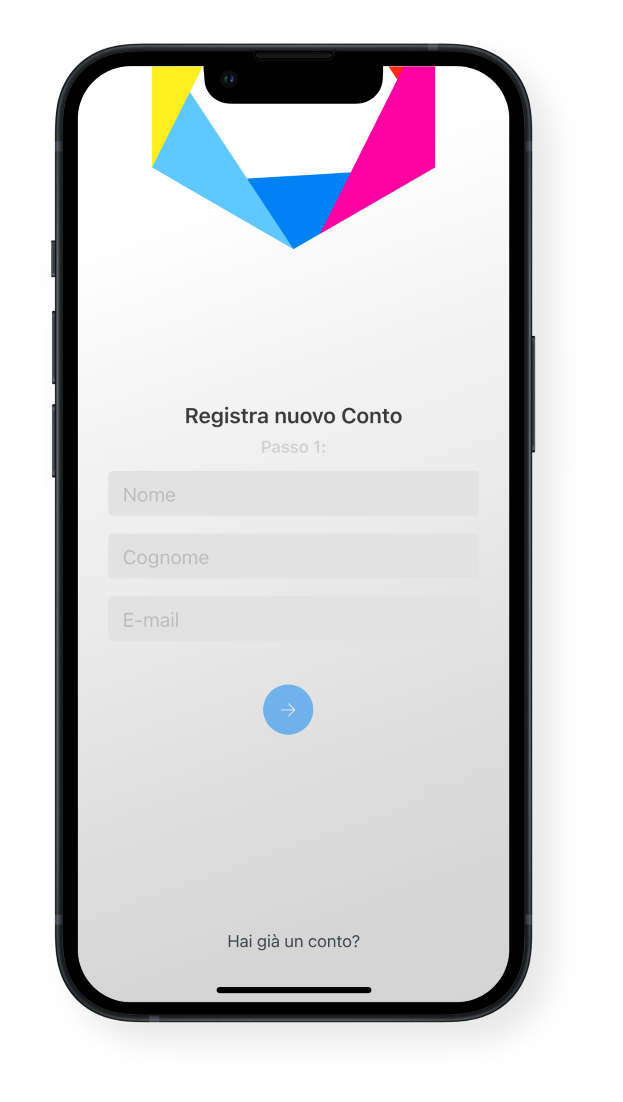
Login/signup screen
- URL:
https://brokerCrmUrl.com/auth/login - Parameters:
firstLogin,lang,source,theme,partnerId
If your login/signup page allows users to login or signup using their Apple ID (using the Sign in with Apple button or equivalent), note that the creation of user accounts using @privaterelay.appleid.com addresses is not supported. Any API requests containing such emails will return an error response. To this end, and in order to ensure a smooth user experience, we request that you either implement corresponding logic to prevent the use of such email addresses, or consider removing social authentication options from your login/signup screen.
- Web: 1
- Web: 2
- Web: 3
- Mobile: 1
- Mobile: 2
- Mobile: 3
-8f37092270a9877ac4009b0c4b8b727b.png)
-d6791e10c5b55cf0ad8b45f4dbecc210.png)
Account creation screen
- URL:
https://brokerCrmUrl.com/account/create - Parameters:
userId,lang,source,theme
Success callback screen
- URL:
https://brokerCrmUrl.com/callback/success - Parameters:
token